White background in Photoshop
How do you do it?
Here is one my workflows.
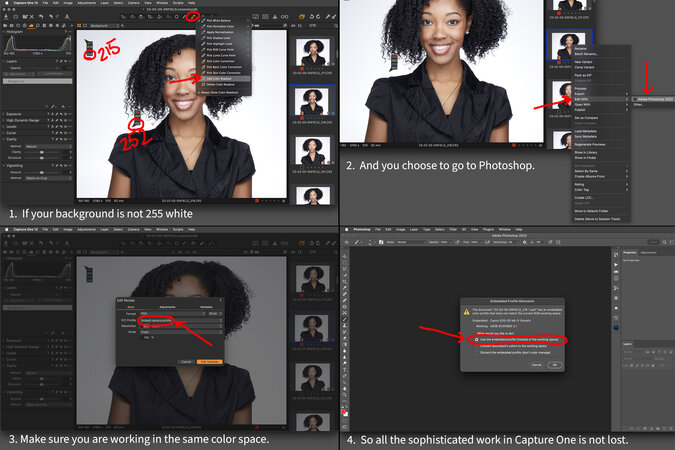
Color space is important, but we need to take extra care switching from one software to another (our camera is using software, so how many are considering that too?)
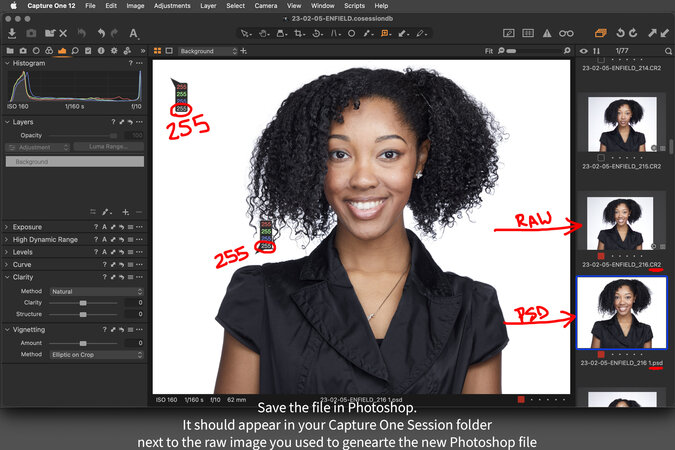
1. Use the color readout in Capture One to see if background is 255 white. If not, and I need to go to Photoshop, then I right click "edit with" photoshop to create a new file that will push out to Photoshop. I embed my camera profile and make photoshop respect the color space, so nothing changes.
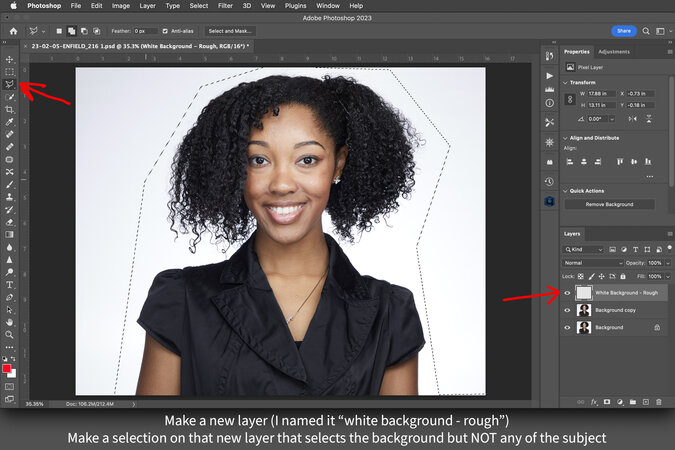
2. I make a new layer and select an area outside the subject.
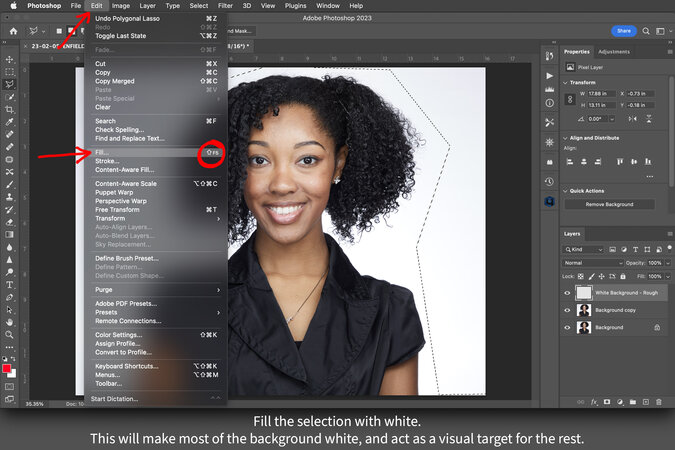
3. Fill the selection with white. This gives me a visual target for later steps.
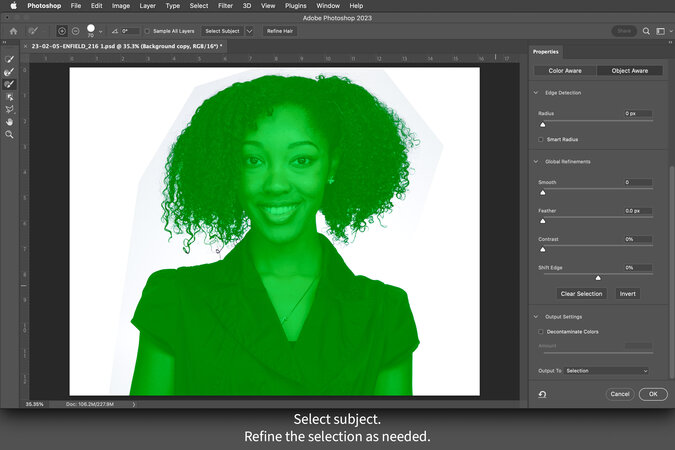
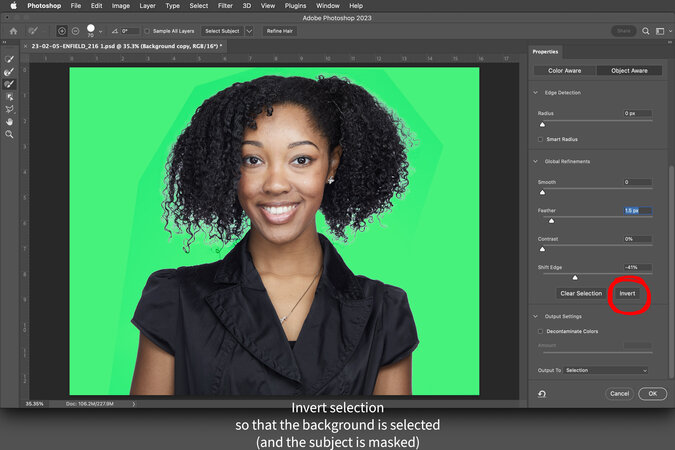
4. Use the background layer to select my subject. Refine that selection.
5. Invert the selection so the background is selected (and subject masked).
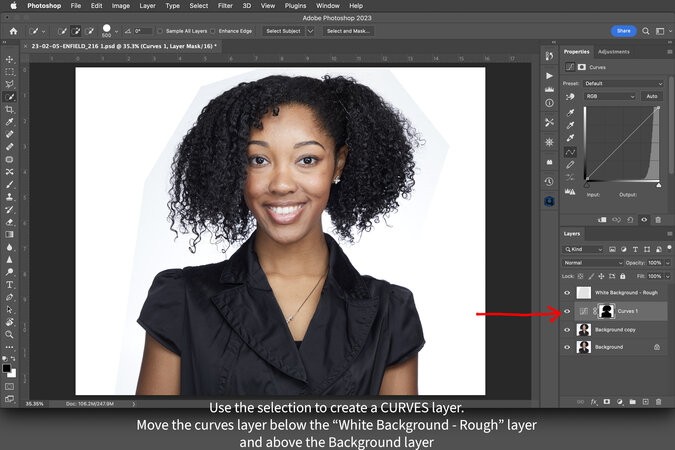
6. Use the selection to create a curves layer.
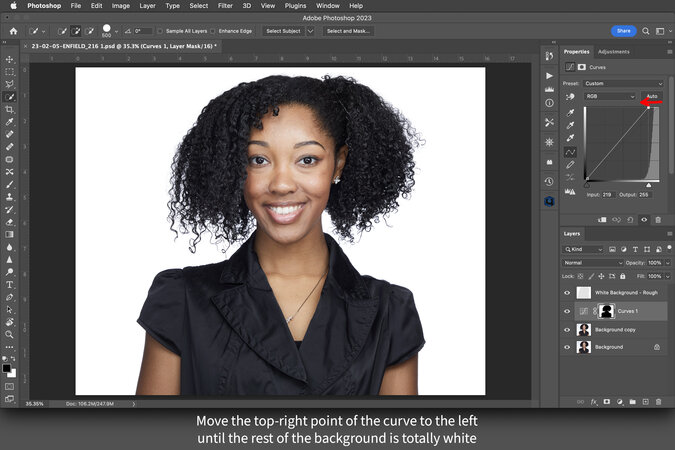
7. Move the top-right point of the curves layer to the left until the rest of the background matches the white of the target layer (from 3).
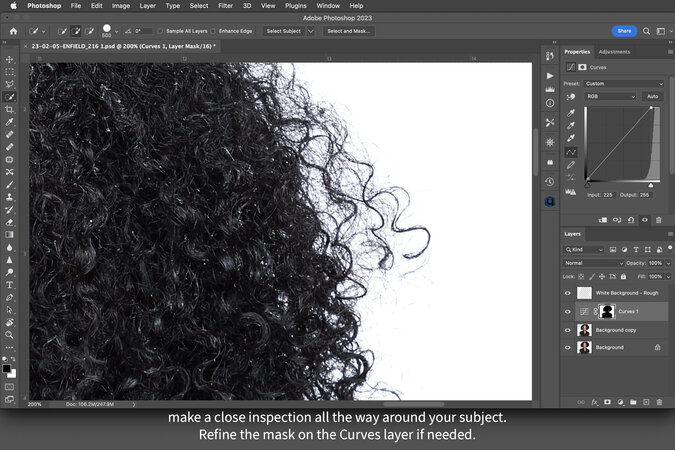
8. Inspect all around my subject to see if the mask need refining or any other adjustments are needed.
9. Save and go back to Capture One. The new file is sitting in the same session with the origina raw.
This is how I do it in Capture One (without having to go to Photoshop)
https://headshotcrew.com/post/359633


10 Comments
So this is what you're doing in the Crew Hangout after drinking 7 Red Bulls. Good stuff Scott.
that was the first one of the day, and I was asleep 90 minutes later. ; )
Wow...this is so helpful!!! Can't wait to try it. Thank you Scott!
I use almost the exact same process, except I add a gaussian blur at the end of about 4 pixels so the transition from subject to background isn't so rough
that's good trick
You can also feather the selection instead.
In this example it is feathered 1.5 pixels. I don't worry too much about accuracy at this point since the process makes a layer mask that can be refined too.
Applying a Capture One Style as a Layer
https://headshotcrew.com/post/361080
Style Brush Hack
https://headshotcrew.com/post/381822
What is a Style?
https://headshotcrew.com/post/362807
Match your Champion Image
https://headshotcrew.com/post/372192
Layers and Color in Capture One
https://headshotcrew.com/post/354061
Color Editor - Capture One
https://support.captureone.com/hc/en-us/articles/…
White backgrounds in Capture One and Photoshop
https://headshotcrew.com/post/359633
https://headshotcrew.com/post/359636
Capture One single tool reset and apply to multiple images
https://headshotcrew.com/post/362804
Color Theory
(click the links in the comments of this post. Rich Soublet, and others, have added great resources!)
https://headshotcrew.com/post/365419
What color space to use (sRGB, Adobe 1998, other?)
https://headshotcrew.com/post/378348
CO file management
https://headshotcrew.com/post/363364
Odd thing with previews not rendering and file naming
https://headshotcrew.com/post/376321
Bookmarked - thanks for sharing this post, Scott!
Bookmarked. Thanks
Log in or Create an account to post comments.